Hai friends...I was inspired by pasanga movie poster, which is given above. The color combination is really interesting...It is very easy to create such a poster. I am going to recreate that with a different picture. This is the image we are going to create.
FINAL RESULT
The final image may feel something different from the original one. But the technique used is same.And i choose black shade gradient instead of white.
So lets start
STEP 1
Open a new blank window or open a pic. When you are choosing a picture the things you should care about are
1) Always choose images with white background. That is background lighting should be higher
2) This technique is well worked with mid range shots. If you are trying for long shots,try to avoid trees.
1) Always choose images with white background. That is background lighting should be higher
2) This technique is well worked with mid range shots. If you are trying for long shots,try to avoid trees.
I am opening the image given below for processing
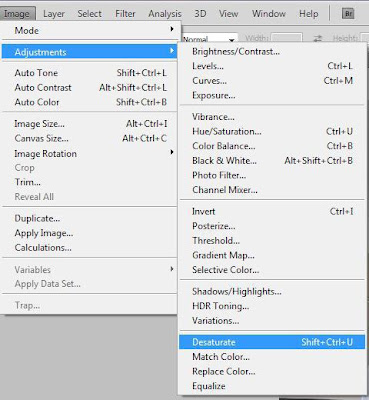
Desaturate the picture.
Image > Adjustments > Desaturate.
STEP 3
Posterize the desaturated image.
Image > Adjustments > Posterize
Image > Adjustments > Posterize
You can find the same menu item in the snapshot given above. The resultant image after this transformation will look like this
For posterizing I selected level 6
For posterizing I selected level 6
STEP 4
Increase the brightness and contrast of the image above. The level will vary with your image. Select an appropriate level for your image.
Image > Adjustments > Brightness/Contrast
After the adjustment image will look like this
In the next step I used Gradient tool with black to transparent and added all titles.
And the final image looks like this
And the final image looks like this
thankyou..................


No comments:
Post a Comment